If you’ve just received your new hair topper and the part line looks a little too “perfect,” don’t worry, that’s completely normal! With just a few simple steps, you can transform that factory-fresh part into an incredibly natural part.
Today, I’m sharing exactly what I do every time I receive a hair topper to make the part line look realistic and seamless. This method is easy, beginner-friendly, and only takes a few minutes!
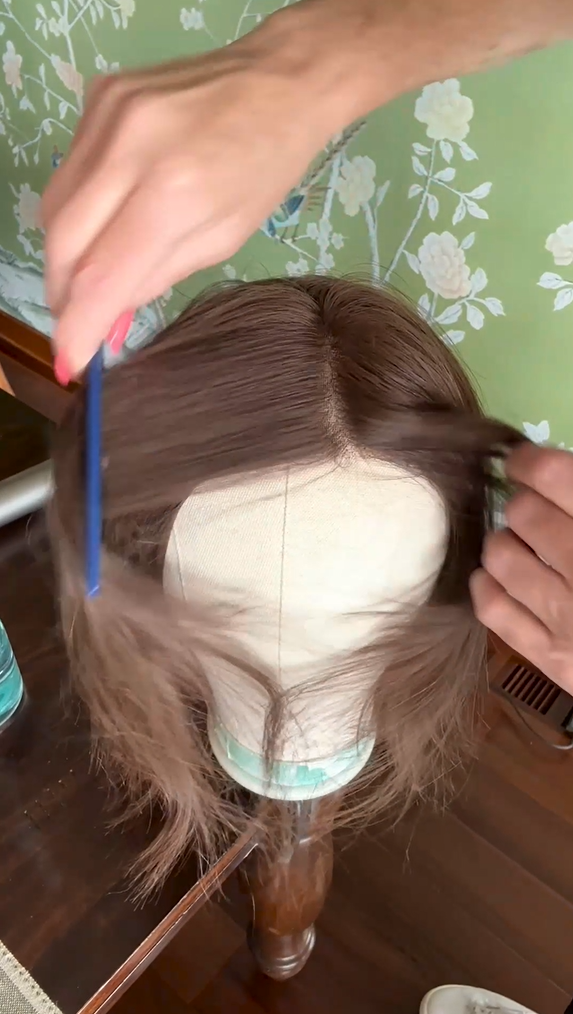
Step 1: Adjust the Part Line
Everyone has their favorite part—center, side, or slightly off center. I personally love a subtle side part.
“I like to have my part a little bit off center… so I start by just moving that part line with a fine-tooth comb. I try not to make it too perfectly straight.”
Using a fine-tooth comb, gently shift the part where you want it. Keeping the part slightly imperfect will help mimic natural hair growth.
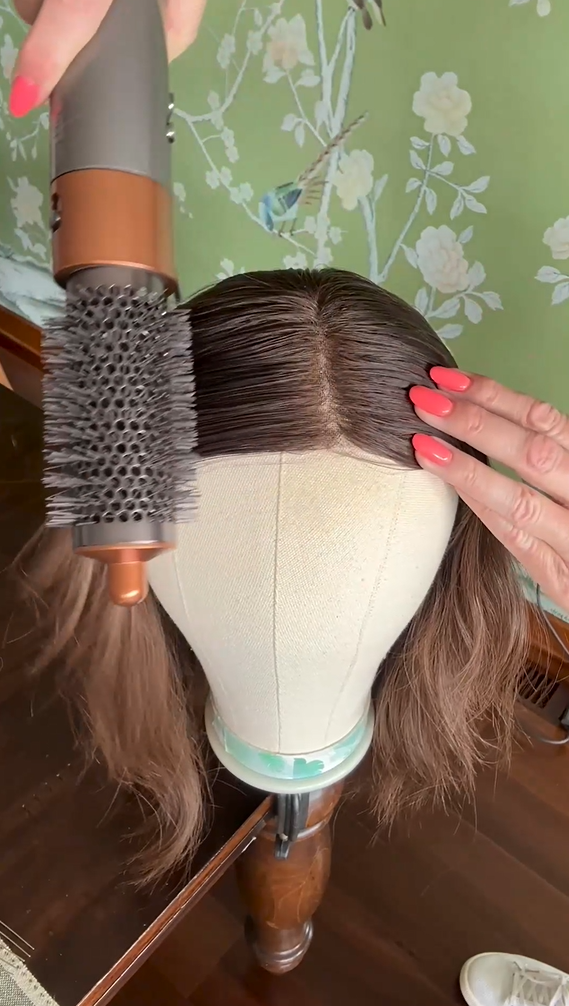
Step 2: Set the New Part With Water & Heat
Next, spray a little water on the part to help train the hair.
“I just use a little bit of water to spritz on there… then I get my hair dryer on medium heat, low air to dry that down.”
Use low airflow and medium heat while brushing the hair flat as it dries. This smooths the hair topper and teaches the hair to stay in your new part direction.
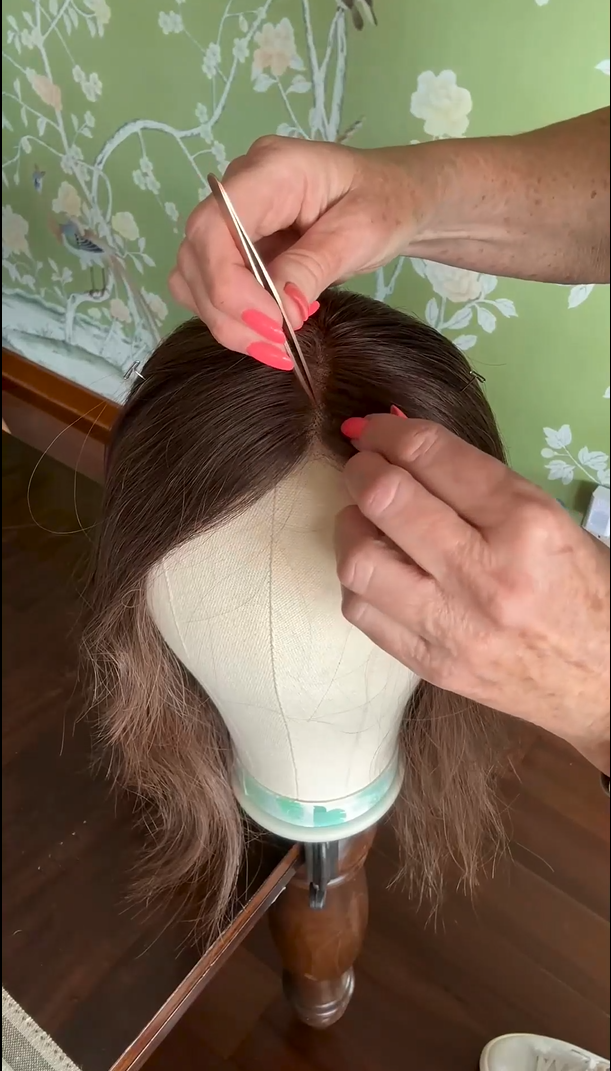
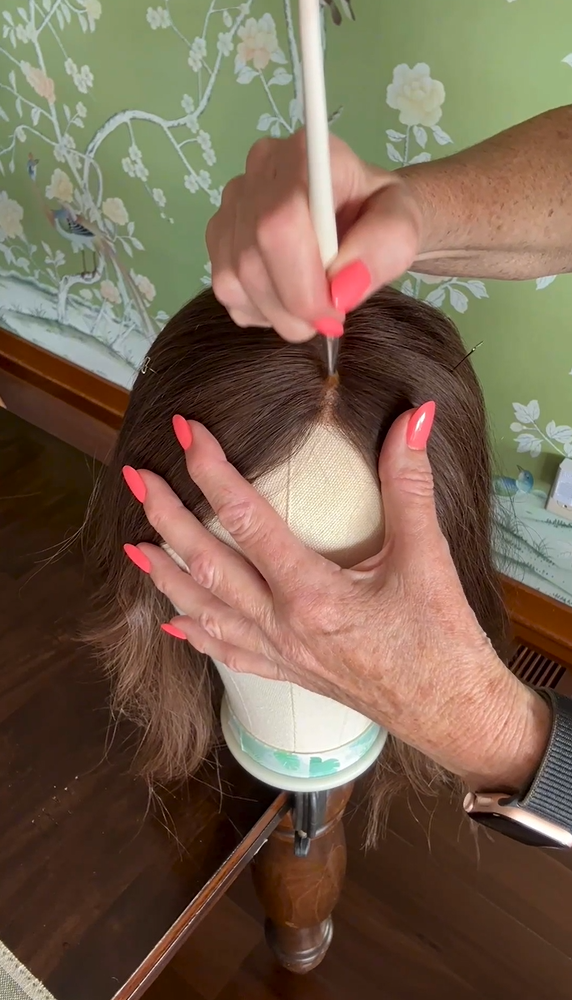
Step 3: Pluck a Few Hairs (Don’t Panic!)
Tweezing the part helps soften the line and adds realism, but less is more here.
“After I have it dry… I take my tweezers and I just very lightly pluck out a few of the hairs… only very few hairs just to give it a more natural looking part.”
Take your time and pluck only a few strands along the part. The difference is subtle—but powerful! But the method of plucking hairs directly from the base may damage the lace or mesh foundation. So we don’t always recommend this method!
Step 4: Create a Skin-Like Scalp Look
If you have darker bio hair underneath, the part may look shadowy. That’s where scar-tape comes in.
“Included in your topper kit is some scar tape… When you’re looking through the part line from the top, you’re seeing the flesh color.”
Apply the tape under the part so it mimics scalp color, especially if your natural hair contrasts with the hair topper base.
Step 5: Add Powder for a Seamless Finish
A touch of makeup can blur knots and match the hair topper to your skin tone.
“I take some face powder… in my natural skin tone, and dab it along the part line with an angled brush.”
Blend lightly with your fingers—this softens the line and creates a truly natural scalp effect.
The Finished Look
After these steps, your hair topper part will look softer, more realistic, and custom to you.
“It gives a really nice blend when you put the topper on.”
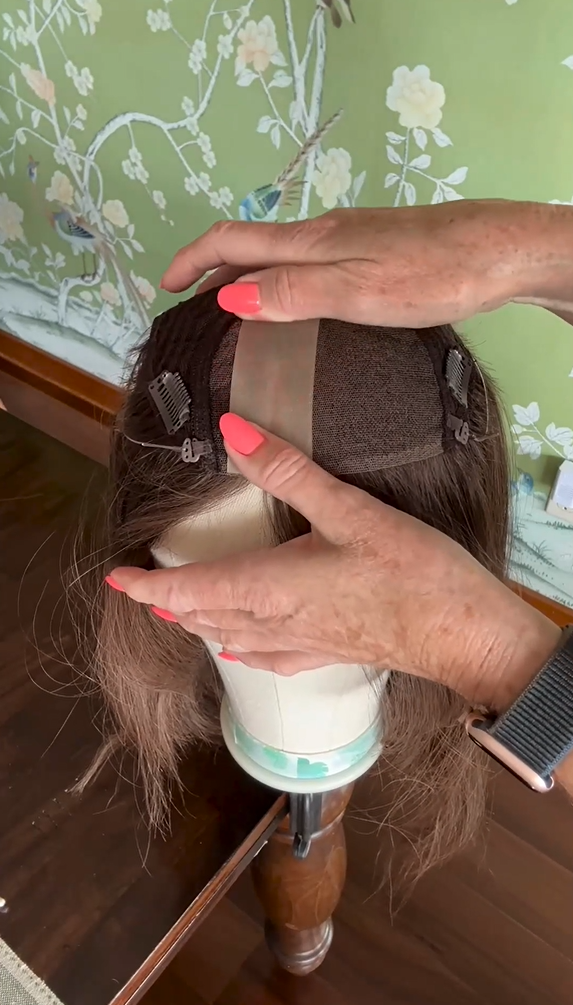
This method works especially well on closed lace hair toppers, like the Airy Elegance (shown here in Truffle Brown).
Final Thoughts
The first time you do this, go slow and be gentle—it gets easier every time. Don’t be afraid to customize your hair toppers. Tiny tweaks make a huge difference in confidence and natural appearance!